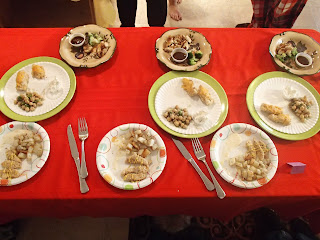
This summer I developed a borderline obsession with the TV show on Food Network entitled, "Chopped". It is a cooking show where four chefs compete for $10,000 as well as the title of Chopped Champion. Each episode has three rounds: appetizer, entree, and dessert. They are given a basket of four different mystery ingredients each round that they are to include in their dishes. The time allotment for the appetizer round is 20 minutes, and 30 for entree and dessert. The judges (professional food experts) taste and critique their food and determine who is eliminated from the round.
In October, I had the idea to host a home edition of Chopped--as my family also loves watching the show. My maiden name is King so we decided to title our competition, "King of the Kitchen". I typed up a script, planned out the basket ingredients, and gathered various things to bring to the competition. For the prize, I embroidered a white apron. I love alliteration (as I'm sure you've noticed based on the titles of my blog posts) so I decided to theme each basket around a letter.
Appetizer - T
Tuna
Tangerines
Tortillas
Tater Tots (we precooked them)
Entree - C
Chicken
Cream Cheese
Chickpeas
Crackers (Ritz)
Dessert - R
Rolos
Rice Krispies
Rambutan (a tropical fruit)
Reddi Whip
The competitors were my sisters, my brother, and my sister-in-law. The judges were my mom, my grandma, and my husband. We set up the pantry, created four stations, and brought out utensils/appliances for use. I informed the chefs of the rules and the competition began! I video recorded several portions of the competition and compiled them into one video.
All in all, the competition turned out well! At the beginning we had two cooks in stations in the kitchen, and two stations set up on the table. As we went on, the stations at the table were eliminated. The kitchen was a little tight at times but things worked out. It was a great bonding experience and we hope to make it into a tradition. Try it out with your family!
My sister-in-law, NaTasha, was deemed the "King of the Kitchen" :) Below are some pictures. Here is the link to the video: https://www.youtube.com/watch?v=PyxDqNVgrGw
Monday, January 23, 2017
Monday, January 16, 2017
Lasting Love
"Never stop dating your spouse" is a common piece of advice given. Jared and I have a date box to help us perpetuate that. A coworker gave me the idea; she said she and her husband had a plastic container that they kept treats in to pull out when they watched a movie together. One summer before we were married, we made a date bucket list and put that in our date box. For our wedding, we received several gift cards for eating out and for other dates, so we put those in the box. Our Twelve Dates of Christmas that we brainstormed (see Christmas as a Couple post) were also in the box. Your date box can vary in size, shape, material, and contents. Our first date box was made of cardboard; we have since purchased a wooden box and currently use that. Having this date box in a place we always see it has reminded us to continually go on dates.
Monday, January 9, 2017
Quick Quilt
For Christmas this year, my sister-in-law requested wall decor for her recently purchased apartment. She had talked about a scrapbook paper quilt she'd seen on Pinterest so I set out to make one. Keeping in mind her living room colors (red and brown) and using the picture as a reference, I ended up with the following:
If you'd like detailed instructions, see the Paper Quilt tutorial. Otherwise, here's the simple version:
1. Cut four sheets of desired patterned paper into 2" squares (be meticulous about your cutting so you don't end up with narrow slits between each square in some places like I did in this attempt).
2. Glue the squares onto some type of reinforcement (the tutorial suggests gluing them to illustration board but I just used sheets of cardstock).
3. Place in a frame (the rectangle frame I found was cheaper than the square one)
I copied the pattern shown in the original but plan to experiment with other patterns when I make the next one.
Happy crafting!
 |
| Original |
 |
| Mine |
1. Cut four sheets of desired patterned paper into 2" squares (be meticulous about your cutting so you don't end up with narrow slits between each square in some places like I did in this attempt).
2. Glue the squares onto some type of reinforcement (the tutorial suggests gluing them to illustration board but I just used sheets of cardstock).
3. Place in a frame (the rectangle frame I found was cheaper than the square one)
I copied the pattern shown in the original but plan to experiment with other patterns when I make the next one.
Happy crafting!
Subscribe to:
Comments (Atom)


